Are you ready to elevate your nail game without the need for a trip to the nail salon? Ombre nails are the perfect way to achieve a trendy and stylish look right from the comfort of your own home. Whether you’re preparing for a special occasion or just wanting to pamper yourself with a fresh manicure, this guide will help you create stunning ombre nails effortlessly.
What You Need for Ombre Nails
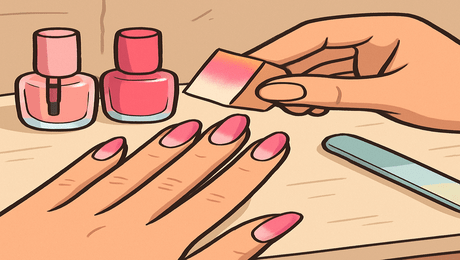
Before diving into the process, it’s crucial to gather all the necessary tools to ensure a smooth application. Here’s a simple checklist:
– Base Coat and Top Coat: Protect your nails while sealing in your design.
– Nail Polish: Choose two or more complementary colors.
– Makeup Sponge: This is essential for blending the colors.
– Nail Art Brush: Helpful for additional detailing.
– Tape: To protect your cuticles from polish.
– Remover and Cotton Balls: For cleanup.
Step-by-Step Guide to Creating Ombre Nails
Creating ombre nails at home is easier than it sounds! Follow these steps for a flawless finish:
-
Prep Your Nails: Start with clean, dry nails. Apply a base coat to protect them and allow it to dry completely. Once dry, tape around your cuticles to prevent messiness.
-
Apply Base Colors: Paint your nails with the lighter shade you’ve chosen. This will serve as the base for your ombre effect. Let it dry completely. You can find reputable nail beauty products at your local nail salon, or shop online for colors you love.
-
Prepare the Makeup Sponge: Take your makeup sponge and paint stripes of your chosen polish colors side by side. For a classic ombre look, use one or two shades ranging from light to dark. The more colors you incorporate, the deeper the effect.
-
Dab the Sponge: Gently press the sponge onto your nail, moving it up and down to blend the colors. You may need to repeat this process a few times until you achieve your desired look. Each dab should smooth out the colors to create a seamless transition. It’s okay if it gets a little messy; you can clean up any overflowing polish later!
-
Final Touch: Once you’re satisfied with the ombre effect, let your nails dry before applying a top coat to seal the design. Your ombre nails will not only look striking but will also have a smooth finish thanks to the top coat.
Celebrate Your New Look!
Now that you’ve successfully completed your ombre manicure, take a moment to admire your handiwork! If you need a little inspiration or want to explore more nail styles, don’t hesitate to visit Elite Nail Spa Acworth to discover a plethora of designs and professional services available.
Conclusion
Creating ombre nails at home is a rewarding experience that allows you to express your style creatively. With the right tools and these simple steps, you can achieve a beautiful look without stepping into nail places near you. If you’re looking for professional care and want to try out some of our stunning ombre nail designs, remember that Elite Nail Spa Acworth is always here to assist you!
Voted Best of Georgia 2024! Serving clients in Acworth, Kennesaw, Marietta, and Woodstock, Elite Nail Spa Acworth offers expert care and luxurious nail services in a clean, modern setting. Book your appointment today and experience why we’re the top-rated nail salon in Georgia.
Useful Links:
– Elite Nail Spa – Book Your Appointment Now
– Home Page
– Services
– Location


Leave a comment